Good News: Reusing Your No-Sew Bags Saves Wild Otters
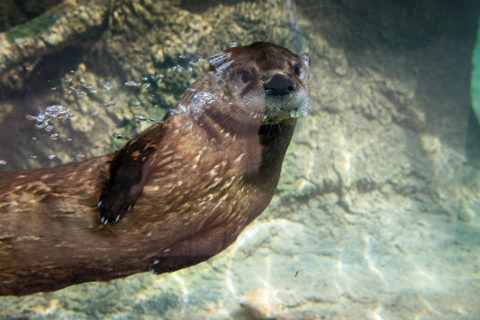 Who else thought the North American river otters were otterly adorable? Our keepers and veterinarians provide these playful critters with the most extraordinary care. During the Facebook live, you likely learned that the North American river otters at the Houston Zoo are a species that can be found in the wild throughout North America, including right here in Texas. To survive in the wild, otters need clean and healthy waterways. By tuning in today, you learned a fun new way to reduce single-use plastic use, keeping it out of waterways to protect otters and their habitat – making no-sew T-shirt bags!
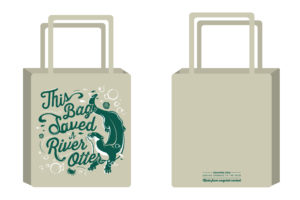
The Houston Zoo is single-use plastic bag, bottle, and straw free – preventing 400,000 pieces of single-use plastics from entering bayous, lakes, and oceans each year. No-sew T-shirt bags are a great way for you to reduce your own use of single-use plastic bags and repurpose some of your favorite shirts, all while saving animals in the wild like the North American river otter. As the name implies, no sewing skills are required, and the bag can be made in less than 20 minutes! To make yours, just follow the steps below.
Materials
- Sharp scissors
- Old T-shirt (thick fabric recommended)
- Colored tape (anything that stands out against your T-shirt)
- Ruler or tape measure (optional)
Making Your Bag
- Cut off the sleeves of your T-shirt. To make the cuts even, fold the T-shirt in half and cut both sleeves at the same time. Cut the fabric just past the seam where the sleeves are sewn to the body of the shirt.
- Take your scissors and free hand cut off the collar of the shirt. Make sure the back and front of the shirt line up and are cut to the same distance. You now have straps for your bag!
- Turn the shirt inside out. Decide how deep you want your bag to be and line up your tape so the bottom part is where the bag will end. Anything under the tape line will be used to close the bottom of the bag.
- Start by cutting the left and right side of the shirt from the bottom up to the tape line, separating the top half from the bottom half of the shirt. Next, use your scissors to cut fringe on the bottom of the bag. Cut both the back and the front layers of the shirt together so they line up. Cut the slits from the bottom of the shirt to the tape line and make them about ½ inch apart.
- Take the first pair of fringe and tie it into a knot. Then tie two more pairs. Continue to do this until all pairs of fringe have been tied together. You will have small gaps between each pair of knots, but these can be minimized by tying knots tightly.
- Note: a pair of fringe means one piece of the front and one piece of the back of the shirt. They should sit one on top of another if the shirt was cut correctly.
- Once all the fringe is tied, remove your tape and turn your bag inside out. If you want the fringe to be part of your bag design, skip the part where you turn the T-shirt inside out!
We can’t wait for you to see you sporting your new T-shirt bags during your next trip to the Zoo when we reopen! In the meantime, you can support the Zoo’s Emergency Zoo Fund, which helps us care for the animals at the Zoo and protect animals in the wild.